How to Assemble Scaffolding the Right Way
Why Proper Scaffold Assembly Matters
Scaffolding is a temporary structure, but the danger is very real. One loose pin, one soft patch of ground, or one missing guardrail can turn a normal workday into a major emergency. The good news? When you assemble scaffolding with care, it becomes a steady, reliable platform that helps your crew work faster and safer.
A big reason scaffolding goes wrong is simple: people rush. They skip small steps because they “look fine.” But scaffolding doesn’t forgive shortcuts. It can sway, sink, tip, or overload sometimes without warning.
Safety agencies stress stable footings, solid platforms, and proper fall protection because these are the areas that fail most often. OSHA’s guidance highlights the basics like stable footings and full planking, and it also emphasizes training and inspections standards consistently followed by professional scaffolding contractors in Coimbatore to reduce risk and improve on-site safety.
Know Your Scaffold Types Before You Build
Before you snap a single brace into place, make sure you’re using the right kind of scaffold for the job.
Supported vs Suspended Scaffolds
- Supported scaffolds stand on the ground using frames, posts, and base plates. They’re common for siding, painting, and masonry.
- Suspended scaffolds hang from above using ropes or hoists (common on tall buildings).
This guide focuses mainly on supported scaffolds, because they’re the most widely assembled on job sites.
Pre-Assembly Planning and Site Prep
This is the part people skip and it’s the part that prevents disasters.
Ground, Base Plates, and Mud Sills
Your scaffold is only as strong as the ground under it. OSHA’s scaffold guidance clearly stresses that scaffold legs, frames, and uprights must bear on base plates and mud sills (or another firm foundation), and that footings must be level and able to support the load without settling.
Practical steps:
- Remove debris, ice, and slippery mud.
- Check for soft soil or recent trenching.
- Use mud sills on soil, gravel, or uneven ground to spread the load.
- Never support a scaffold on unstable objects.
Clearances: Power Lines, Doors, Walkways
Do a quick walk-around:
- Identify overhead hazards (power lines, tree limbs).
- Keep paths clear for workers and materials.
- Plan where tools and supplies will be staged (so you don’t overload one corner).
Related: https://blog.gmscaffolding.in/setup-mobile-scaffolding-on-uneven-ground/
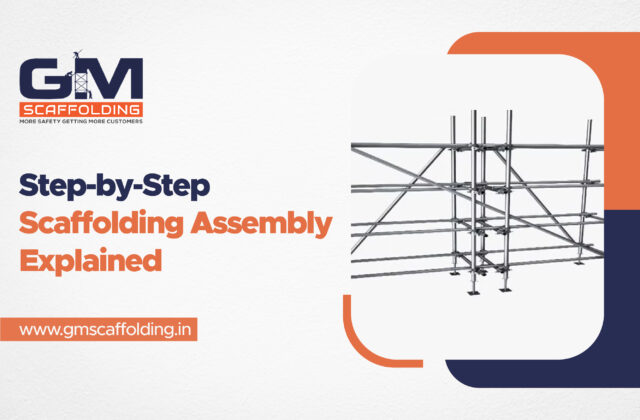
How to Assemble Scaffolding the Right Way: A Step-by-Step Method
In the first 10% of this article, here’s the promise: How to Assemble Scaffolding the Right Way is about building from the ground up literally so the scaffold is level, braced, properly planked, and protected before anyone climbs up.
Step 1: Mark Layout and Set Footings
- Mark the footprint of the scaffold on the ground (chalk line works well).
- Place mud sills where each leg will land (especially on soil).
- Set base plates on top of the sills.
- If you use leveling jacks, keep adjustment reasonable and stable (don’t “jack it to the moon” just to reach height).
Goal: every support point should be level, solid, and able to carry the load.
Step 2: Build the First Bay (The “Truth Layer”)
Think of the first bay as the foundation of a house. If it’s crooked, everything above it will fight you.
- Stand the first two frames (or standards).
- Install the cross braces.
- Confirm the bay is square (diagonal measurements match).
- Confirm it’s plumb (straight up and down).
- Lock pins/clips fully—half-locked is basically unlocked.
Step 3: Add Platforms and Planking Correctly
Now build your working surface—but do it with intention.
Key platform rules to follow:
- Fully deck the platform (don’t leave surprise gaps).
- Platform ends should extend over supports properly. OSHA states each end should extend at least 6 inches over the support centerline unless restrained, and limits how far platforms can extend depending on length.
- If you overlap planks to create a longer platform, the overlap must occur only over supports and be not less than 12 inches unless restrained to prevent movement.
Step 4: Tie-Ins, Guys, and Bracing
Height changes everything. A scaffold that feels solid at 6 feet can become a sailboat at 26 feet.
A widely used stability concept in regulations is the 4:1 ratio: if the scaffold height is more than four times the base width, it needs restraint (tie, guy, brace, or equivalent). The eCFR text for OSHA scaffold rules describes restraint requirements for supported scaffolds exceeding a 4:1 height-to-base ratio, including tie/brace spacing guidance.
Common Scaffold Assembly Mistakes and Fixes
Unlevel Base or Skipping Mud Sills
The mistake: Setting legs directly on soil or uneven ground.
The fix: Reset the bay. Add mud sills. Re-level. It’s annoying, sure but it’s a lot less annoying than an accident. OSHA specifically calls for base plates and mud sills or an adequate firm foundation for supported scaffolds.
Improper Plank Overhang and Overlap
The mistake: Planks hanging too far past supports or overlapped incorrectly.
The fix: Follow the platform extension limits and overlap rules (including the 12-inch minimum overlap over supports unless restrained).
Not Tying In a Tall Scaffold
The mistake: Building higher without restraint.
The fix: Add ties/guys/braces following manufacturer instructions and the stability requirements (including the 4:1 restraint concept in OSHA rules)
Conclusion: Build It Once, Build It Right
Scaffolding doesn’t have to be scary but it does have to be built with respect. A solid base, correct bracing, safe platforms, proper fall protection, and routine inspections are the winning combo.
When you build with patience and discipline, your scaffold becomes what it should be: a dependable tool that helps everyone go home safe. To make sure you have reliable materials and support, always choose the right scaffolding rental supplier who provides quality equipment and guidance for safe assembly.
FAQ
1) Do I really need base plates and mud sills?
If you’re on soil or anything that can settle, they’re a huge deal. OSHA guidance states scaffold legs/frames/uprights must bear on base plates and mud sills (or another adequate firm foundation).
2) What’s the minimum plank overlap when I overlap platforms?
OSHA states overlapped platforms must overlap at least 12 inches and the overlap should occur only over supports, unless restrained to prevent movement.
3) What does “4:1” mean for scaffold stability?
It’s a stability concept: if the scaffold is more than four times as tall as its base is wide, it generally needs restraint (tie/guy/brace or equivalent). OSHA’s eCFR text describes restraint requirements for supported scaffolds exceeding a 4:1 height-to-base ratio.
4) Can I climb the cross braces like a ladder?
It’s a common habit but a bad one. Use proper access like ladders, stair towers, and gates. Safety standards also discourage using crossbracing as access.
5) Who is allowed to inspect scaffolding?
A competent person with the right training and authority to identify hazards and correct them. OSHA’s scaffold guidance discusses inspections and competent oversight.